I call it Dicing because, as you’ll see, we’re making clips, which, though the same size as the clips in the Slice method, are more finely honed so only the clip’s defined duration remains with each clip. Once again open your master clip into the Viewer.
In the Viewer find a shot you want to keep. Mark up the In and Out points as you did in the first Slice method. Now instead of just dragging the clip into the Browser, hit Cmd-U. Why U I don’t know, but U it is. Cmd-U creates a subclip that automatically appears in the Browser with the same name as the clip it was taken from and with the name highlighted. You could also use the Modify menu and go to Make Subclip. Notice the different icon created for subclips, indicating that they are torn out of another clip.
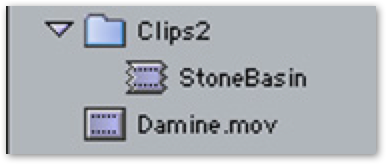
Subclip in Bin
Let’s see how the Dice method is different from Slicing. Open the newly created subclip into the Viewer. Unlike a Sliced clip that has its In and Out as a small portion of the master clip, in the subclip the In point and Out point do not appear at all.
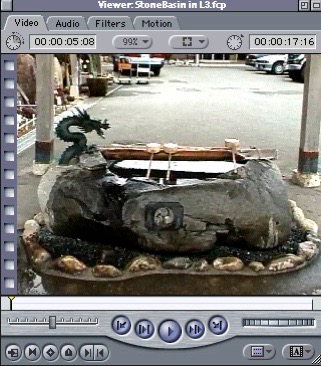
Figure 3
Subclip in the Viewer
The subclip is treated as a separate piece of media, though in reality it’s not. Notice the film sprocket holes on the left side of the frame in Figure 3. Whenever you see this, on the left or right edge of the frame, it’s the indicator that you’re at the limit of the media for that clip. Though the Subclip is only a portion of the piece of media on your hard drive for your master clip, it’s treated in FCP as a complete, self-contained piece of media, hence the film sprocket indicator. The real advantage to working in the subclip method of editing is that it’s of course very easy to scrub the clip, running the mouse along the length of the media, but if you need to access more of the media within that clip it’s a little more difficult. All you have to do is select from the Modify menu Remove Subclip Limits.
When you do this the clip, if it’s in the Viewer, will suddenly disappear and a Slug will be loaded in its place. I’m not sure why the application does that, but it does. If you again open that clip after the subclip limits are removed, the clip has reverted to its whole length. You can also remove subclip limits from a shot or a whole bin of shots if you wish directly in the Browser. Just select the bin and pull down Remove Subclip Limits from the Modify menu. All the subclips will revert to full length clips.
The fact that you can’t normally exceed the limits of the subclip is also an advantage, while being a problem with the Slice method described earlier. The problem is transitions. These take extra media, extending the shot to create space for themselves. Transitions will take any available media. In the Slice method that media may include sudden zooms, garbage frames, or bits of another shot. These will appear as a sudden flash during a transition, barely noticeable, but disconcerting. Because subclips can’t extend the media beyond their duration, this will never happen with a subclip. The trick to Dicing is to make sure that you include in your subclip not just the really good bit of the shot you want to use, but extra material, in fact probably as much material as you can safely without including any garbage or spurious frames. This will allow the transition room to extend the material as long as required.
![]()
Copyright © 2002 South Coast Productions