IMPORTING OVERSIZED IMAGES AND IMAGES WITH EFFECTS
When you import an oversized Photoshop file and place it inside a sequence, FCP will immediately scale the image. If the still is smaller than the image resolution, say a 500x200 image in a 720x480 DV sequence, the application will simply place it in the center of the screen with blackness around it. If the image is, say, 400 pixels wide but 800 pixels tall, FCP will scale it down to fit inside the window, as in Figure 8.
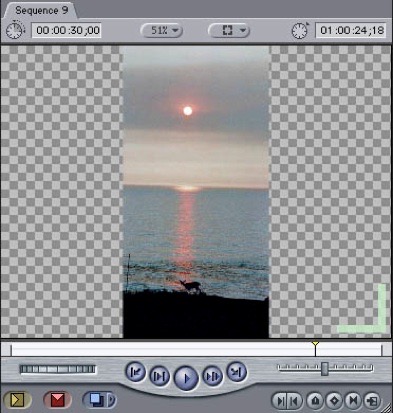
Figure 8
If you do want to use the image at its full size, so that you can move across it, for instance, the first step you’ll have to do is to return it to its full size.
Select the image in the Timeline and hit the Enter or Return key. Or Option-double click on it to open it into the Viewer.
Click on the Motion tab in the Viewer.
Set the Scale value back to 100.
Be careful that any Photoshop file you import into Final Cut has no empty layers, or adjustment layers, or layers with effects applied that have not been rasterized. Effects will not import properly unless rasterized or converted to Smart Objects (only available in recent versions of the application).
To rasterize a layer the simplest way is to place an empty layer underneath the layer with the effect.
Then select the layer with the effect and from the Layers palette wing menu choose Merge Down (Figure 9).
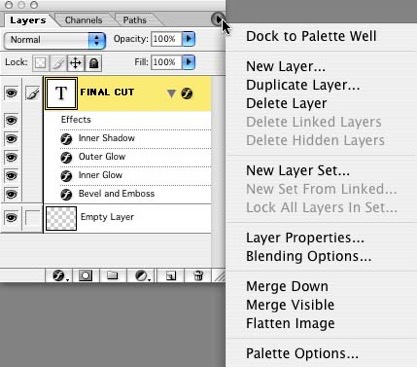
Figure 9
A better way that will allow you to keep the Layer Styles editable while still having them appear properly in Final Cut is to convert the layer to a Smart Object.
Once you've created the Style, you can right-click on the layer in the palette and select "Convert to Smart Object". This embeds the style in the layer. To access the style again, simply double click the icon on the lower right corner of the thumbnail as in Figure 10.
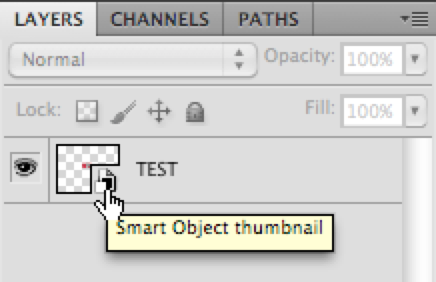
Figure 10
This will bring up the style settings, allowing you to edit them, save them, and have the graphic update in Final Cut.
![]()
Copyright © 20042006 South Coast Productions